Installation
The following are the steps to install DigiOz Guestbook on your Website:
- Download the Guestbook ZIP file from http://www.digioz.com/downloads/php/guestbook.zip.
- Extract the ZIP file on your local machine.
Windows: First Right-Click on the ZIP file and choose "Properties", then click on the "Unblock" button. Next, Right-Click on the ZIP file you just downloaded, and choose "Extract All ..." to extract all the files in the ZIP to your local directory.
Unix/Linux: First navigate to the directory you extracted the file to, then run the command "unzip guestbook.zip -d /tmp" to extract all the guestbook files to your machine's "tmp" directory.
- Upload the guestbook files using an FTP Client Software to your Web Server. We recommend FileZilla Free FTP Client Software, which you can download from https://filezilla-project.org/download.php.
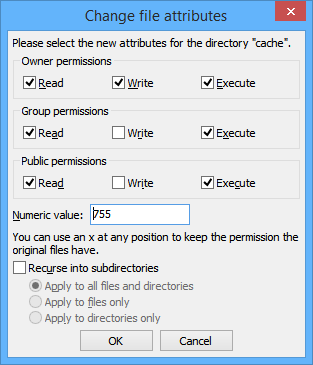
- Using the FTP Client, Right-Click on the "cache" directory in the "guestbook" folder and choose "File permissions ...", then set the File Permission to "755" (Owner: Read, Write, Execute), Group permission (Read, Execute) and Public permission (Read, Execute). Repeat the same for the "data" directory, and all the files inside the data directory, except "index.html".
- On your local machine open the file config.php in the "includes" folder using Notepad or any simple Text Editor, and change the value for $_Username and $_Password to a different Username and Password value. This will be the Username and Password for your Guestbook's Administrative Area.
Before:

After:

Save your changes and upload it to your Webserver using your FTP Client, replacing the old config.php file in the "includes" folder. Please note that if you do not make this change you will leave your guestbook open to the public deleting all your entries!
This concludes the installation of the Guestbook.